

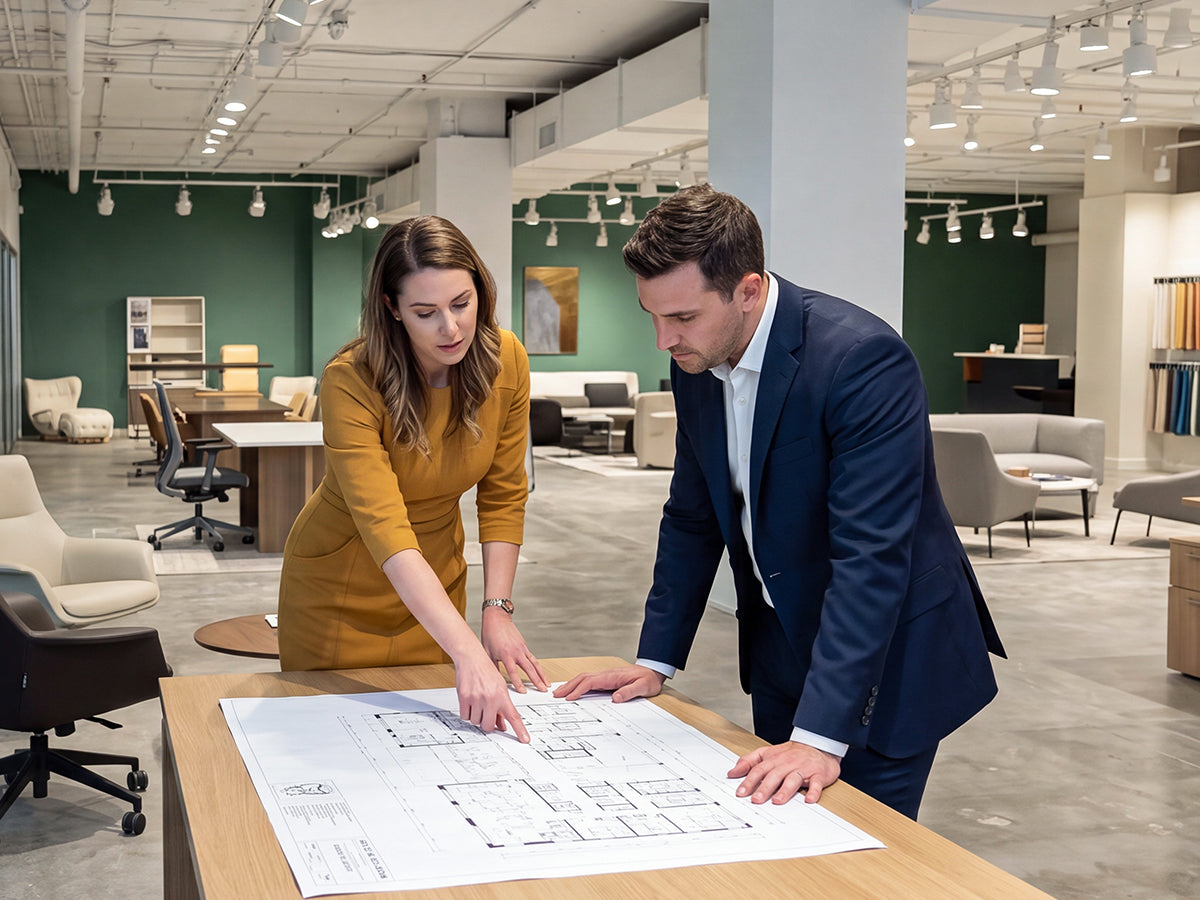


The right conference table size comes from a simple two-axis test, not a single "seats 8" label. Measure your room's usable length and width after subtracting doors, columns, and fixed furniture, then check that your candidate table plus clear zones on every side still fits inside that usable space.
If it does, the same table still has to pass a display-sightline check and a power/data check before it belongs in a purchase order. Following a structured conference table size guide based on room dimensions and chair count helps eliminate costly circulation bottlenecks and procurement rework.
Start With the Usable Room Envelope: A Table-Size Selector
Before comparing table models, run one formula: usable dimension minus the clear zones on each side must be greater than or equal to the table's length or width on that axis. The scenario rows below are a starting point for your first pass, not a final answer.
The two-dimensional fit formula
Define usable length and usable width as the room's nominal dimensions minus whatever space is occupied by doors, columns, credenzas, displays, or other fixed obstructions. For each axis, the rule is: table dimension ≤ usable dimension − side zone 1 − side zone 2. When both sides of the table have the same clearance requirement, this simplifies to usable dimension − (2 × clear zone). A clear zone is whichever requirement is largest at that edge: seated push-back space, a circulation path, or a door swing. Do not add these together if they overlap in the same physical strip of floor; use the larger single value instead.

Illustrative room-to-table scenarios
The table below shows planning examples only. It is not a code, accessibility, or engineering requirement, and your project may need different numbers once you measure the actual room.
| Seat range | Example table size | Example comfortable room size | Use limitation |
|---|---|---|---|
| 4–6 seats | 72" x 48" | 15'4" x 13'4" | Small huddle or team rooms; verify door swing and any wall-mounted display clearance |
| 6–8 seats | 96" x 48" | 16' x 12' | Standard mid-size conference rooms; check end-seat clearance near entry doors |
| 8–10 seats | 120" x 48" | 18' x 12' | Larger boardrooms; confirm circulation on the side facing the room's main walkway |
How to use the selector
Start with the row closest to your target chair count, then test both table axes against your room's actual usable length and width, not the nominal room size on a floor plan. If clearance, a display sightline, or a power drop location becomes the limiting factor, drop down to the next smaller table rather than forcing the larger one. Keep a written record of the chair depth, clear-zone widths, and obstruction deductions you used, since the next sections build directly on these numbers.
Measure the Usable Room Envelope Before Choosing a Table
The usable envelope is the room's nominal length and width minus every fixed obstruction that reduces the floor area available to furniture. Get this number right first, because every later calculation depends on it.
Record fixed constraints
Walk the room and note every door and window opening, column, built-in, credenza, wall-mounted display, floor or wall outlet, and the ceiling height. For each door, record the full swing zone, not just the frame width, since an open door needs that entire arc clear of furniture and chairs.
Convert nominal dimensions to usable dimensions
Subtract the obstruction zones that actually intrude on the furniture footprint from the nominal room length and width. For example, a 16-foot (192-inch) room length with a 24-inch door-swing zone at one end leaves a usable length of 168 inches; a 12-foot (144-inch) room width with a 24-inch credenza depth on one side leaves a usable width of 120 inches. Keep every measurement in the same unit, inches or feet, to avoid conversion errors.
Mark the limiting axis
Compare your candidate table's length and width against the usable length and width you just calculated. Whichever axis leaves the least remaining clearance is your limiting axis, and it should drive your shape, seating, and package decisions later in this guide.
Calculate Chair Push-Back and Perimeter Clearance
Chair push-back space and circulation are two different demands on the same strip of floor, and treating them as one number when they overlap will overstate how much space you actually need. Test each table edge separately using the largest single requirement that applies there.
Separate chair occupancy from circulation
A seated occupant plus the space needed to push a chair back and stand typically needs 30 to 36 inches per person as a preliminary planning allowance; a comfortable behind-chair movement zone runs around 56 inches, and a walking path needs roughly 24 inches of clear width. These are illustrative planning figures, not adopted building or accessibility codes, so confirm any hard minimum against your project's own requirements. If a single allowance already accounts for both push-back and passing room, do not add a second circulation strip on top of it.
Test doors, columns, and fixed casework
Apply the real conflict at each side of the table instead of averaging clearance across the whole room. A door swing, column, credenza, or wall-mounted display only affects the side of the table nearest to it, so one edge of an irregular room can legitimately need a different clear zone than the opposite edge.
Record the narrowest clearance
For each axis, confirm table dimension ≤ usable dimension − clear zone 1 − clear zone 2, using the two side-specific zones rather than a single averaged number. As an example, a 96-inch table length paired with 36-inch clear zones on each end needs 168 inches of usable room length, matching a room that already usable to 168 inches after door-swing deductions; the same math applies to the table's 48-inch width against a 120-inch usable room width with 36-inch zones on each side. Choosing the right conference chairs for the room affects the actual push-back distance you should measure, since chair depth and recline range vary by model.
Choose Table Shape and Seating Arrangement for the Limiting Dimension
Table shape is a fit variable tied to your limiting axis, not a style preference to decide first. Match the shape to whichever obstruction, corner, or circulation condition is actually constraining the room.
Rectangular and racetrack layouts
Choose a rectangular or racetrack table when the room has straight walls and predictable alignment, since the limiting dimension is easy to calculate on both axes. Check the end seats and corners separately from the long-edge seating, because chairs at the table ends often need more clearance for access and video-conference camera framing than side seats do.
Boat-shaped and round layouts
A boat-shaped or round table can help when corner clearance, room circulation, or how participants face each other changes which edge of the table is actually usable. Confirm the table's real outside dimensions and seat layout before assuming it fits, since a curved table's nominal length and width do not describe every usable seating edge the way a rectangle's do.
Modular collaboration layouts
When tables can be separated or rearranged into different configurations, size the package to the most restrictive configuration your team actually plans to use, not the largest open-room arrangement the pieces could form. Treat each configuration as its own footprint requiring its own clearance check.
Validate Display and Video-Conference Sightlines
A table can pass every clearance check and still fail the room if attendees can't see the screen or the video call can't see them. Run the display-distance and sightline checks after the furniture fit, not instead of it.
Run the display-distance test
For each seat, measure the viewing distance to the display and compare it against roughly 1.5 to 2.5 times the display's diagonal size. AVIXA's conference room design guidance uses this range as a working example: a 55-inch display would suggest a viewing distance of roughly 82.5 to 137.5 inches, a hypothetical example only, since the correct range depends on your actual display model and mounting height. Treat this as AV example guidance rather than a fixed specification.

Check every seat's line of sight
Beyond distance, trace or calculate a direct line from each intended eye position to the visible display area. A seat that meets the distance range but has its view blocked by a column, another attendee's head, or a fixed fixture still fails the check and needs a different chair position or table orientation.
Escalate camera geometry and AV handoff
Camera framing, lens angle, field of view, and mounting height are unresolved until the specific camera model is documented, so treat participant visibility on the far end of a video call as a separate question from screen visibility in the room. Send your measured seat positions, the display's planned location, and the proposed camera location to an AV reviewer whenever any seat fails the distance or sightline check, or whenever the camera equipment hasn't been selected yet.
Plan Power, Data, and Cable Access at the Table
Power and data access needs to be mapped on the room plan alongside the furniture layout, not assumed from a table's cable-management feature. Coordinate outlet and drop locations early enough that they can still influence where the table sits.
Map existing and planned access points
Mark every existing outlet on the floor plan, then decide where floor boxes, ceiling drops, or built-in furniture access points need to go relative to the table. AVIXA's guidance lists floor boxes, ceiling drops, and integrated furniture solutions as the standard distribution approaches for conference-room power and data, and recommends bringing this planning into the room's early design phase rather than adding it after furniture is chosen.
Separate cable management from building service
A cable tray, grommet, or routing channel built into a table organizes cords; it does not by itself supply electrical power, charging current, or network bandwidth. Any specific claim about outlet count, amperage, charging speed, or data throughput needs to come from the table and equipment manufacturers' own technical documentation, matched to the exact models you're specifying, and coordinated with the power and cable kits you plan to install alongside it.
Verify the installed path
Confirm the actual connectors, routing, and signal path with your AV or IT team before the room is handed over. AVIXA recommends testing every required input-to-output combination in the finished room rather than relying on the design plan alone, since routing, resolution, and audio sync issues often only show up once equipment is actually connected.
Convert the Fit Result Into a Commercial Furniture Package Brief
Once your table range, shape, clearance, sightlines, and power plan all pass, translate that into a written brief you can send for a project or Trade quote. Treat this as a checklist for the request, not a final commitment from either side.
Match a supported table candidate to the measured range
If your usable envelope and clearance math point toward a table in the roughly 94-inch length range, our 94'' Conference Table is a walnut grey option at 94.5"W x 47.2"D x 29.5"H with integrated cable management, sized for boardrooms and larger meeting spaces. This is a conditional footprint comparison only: the product page is currently marked coming soon, so it doesn't establish seat capacity, current availability, installation service, or project-order eligibility on its own. Use the broader conference-table collection strictly for browsing dimension and finish options, not as evidence that every listed configuration is ready to order.
Write the project-order brief
Document each room separately: usable length and width, target seat count, table shape and footprint, chair model or footprint, finish, any accessories, display and camera positions, and the power/data plan you mapped earlier. For a multi-room project, identify which room is the most restrictive and note any configuration that intentionally differs from that baseline.
Confirm freight, installation, and returns in writing
Our current shipping policy treats freight delivery for large or palletized commercial orders as unloading at an accessible dock, loading area, or curb; it does not automatically include unpacking, inside delivery, placement, assembly, installation, or debris removal unless that scope is expressly added to your quote. Processing and release timing for commercial, bulk, custom, or project orders follows the applicable quote, sales order, or project schedule rather than a standard retail estimate, and our posted 30-day return process is limited to qualifying direct purchases, so commercial project-order cancellation and return terms need written confirmation for your specific order. We invite you to submit your measured usable envelope, seat count, display and camera plan, and package requirements through our Trade Program for current project quote review.
FAQs
What information should I send with a conference-room sizing request?
Include the usable room length and width, the obstruction and door-opening zones you subtracted, target seat count, your candidate table footprint, chair assumptions, planned display and camera positions, an outlet map, and any package quantities for multiple rooms. Ask for written confirmation of any unresolved delivery, installation, or return terms before finalizing the order.
When should I request an AV review instead of relying on the table-size scenario?
Request a review as soon as any seat fails the display-distance range or has a blocked line of sight to the screen, or whenever the camera's lens, field of view, mounting height, or signal routing hasn't been documented yet. Send the AV reviewer your measured seat positions along with the planned display and camera locations so the review starts from real numbers rather than assumptions.
How should I size a coordinated package across several conference rooms?
Run the usable-envelope, clearance, and sightline checks separately for each room, since obstructions and dimensions rarely match from one room to the next. Then coordinate shared finishes, chairs, and accessories around whichever room's configuration is most restrictive, and include a room-by-room schedule in your project or Trade quote request so pricing and lead times reflect every room's real requirements.



Leave a comment
This site is protected by hCaptcha and the hCaptcha Privacy Policy and Terms of Service apply.